Spring MVC Tutorial
Hello everybody! A few days ago, I googled ‘Spring MVC Tutorial’ and didn’t find that many references. So I thought if I could write a good tutorial on Spring MVC then that might help lots of people. I don’t know if I’ll be successful but here it is.
This tutorial covers only the basics involving AbstractController and SimpleFormController. I intend to cover AbstractWizardFormController, Hibernate/JPA integration, Tiles, Sitemesh, Ajax, etc. as I learn them and find time to write.
Comments welcome!
1 Required Libraries
| Library Component | Required Jars |
| Spring 2.5 with MVC | spring.jar, spring-webmvc.jar |
| Apache Commons Logging | commons-logging-1.1.jar |
| Jakarta Taglibs 1.1.2 (JSTL 1.1 implementation) | jstl.jar, standard.jar |
Server: Tomcat 6.x or any Servlet 2.5 compliant server.
2 IoC and DI in Spring
Sorry, I won’t be discussing that here.
3 Spring MVC
3.1 Lifecycle of a request in Spring MVC
- A request leaves the browser asking for a URL and optionally with request parameters.
- The request is first examined by DispatcherServlet.
- DispatcherServlet consults handler-mappings defined in a configuration file and selects an appropriate
controller and delegates to it to handle the request. - The controller applies appropriate logic to process the request which results in some information (a.k.a.
model). This information is associated with the logical name of a result rendering entity (a.k.a view) and the
whole is returned as a ModelAndView object along with the request back to DispatcherServlet. - DispatcherServlet then consults the logical view name with a view resolving object to determine the actual view
implementation to use. - DispatcherServlet delivers the model and request to the view implementation which renders an output and sends it
back to the browser.
3.2 Basic Setup for Spring MVC
So the first thing to do is configure DispatcherServlet in web.xml and establish URL mappings for it.
<servlet>
<description>Spring MVC Dispatcher Servlet</description>
<servlet-name>springweb</servlet-name>
<servlet-class>org.springframework.web.servlet.DispatcherServlet</servlet-class>
<load-on-startup>2</load-on-startup>
</servlet>
<servlet-mapping>
<servlet-name>springweb</servlet-name>
<url-pattern>*.htm</url-pattern>
</servlet-mapping>
The servlet is configured but where do you put Spring configuration metadata? By default, DispatcherServlet looks for a configuration file named [servlet-name]-servlet.xml in the WEB-INF directory of your web application. For instance, the servlet defined above, i.e.
springweb, will look for the configuration file /WEB-INF/springweb-servlet.xml.So, you need to create /WEB-INF/springweb-servlet.xml and put your MVC related metadata into it.
3.3 Breaking Up Configuration for Manageability
A web application usually has multiple sets of classes, e.g. request controllers, validators, business logic, data access/persistence, security, etc. Imagine that all of these classes are configured in a single configuration file. Things will get out of hand pretty quickly. So, it is wise to segregate configuration metadata into related chunks in separate files.
If you decide to use multiple configuration files then how do you tell DispatcherServlet about them? As it turns out, you can have multiple dispatchers (with distinct URL mappings) and each will have a separate context defined through its [servlet-name]-servlet.xml file. Each dispatcher will also inherit the root context defined for the entire web application. You can provide additional configuration files through this root web application context using ContextLoaderListener listener that comes with Spring MVC:
	<listener>
	<listener-class>
		org.springframework.web.context.ContextLoaderListener
	</listener-class>
</listener>
<context-param>
<param-name>contextConfigLocation</param-name>
<param-value>
		/WEB-INF/springweb-service.xml
		<!-- more configuration XMLs -->
	</param-value>
</context-param>
The listener looks for /WEB-INF/applicationContext.xml by default, but you want to override it using the context parameter contextConfigLocation as shown above. The code above shows a single file but you can easily specify additional files separating them with spaces or newlines.
3.4 Schema Definitions for web.xml and springweb-servlet.xml
So that you don’t have to look here and there, web.xml contents must be wrapped inside this:
<?xml version="1.0" encoding="UTF-8"?>
<web-app xmlns="http://java.sun.com/xml/ns/javaee"
	xmlns:xsi="http://www.w3.org/2001/XMLSchema-instance"
	xsi:schemaLocation="http://java.sun.com/xml/ns/javaee http://java.sun.com/xml/ns/javaee/web-app_2_5.xsd"
	version="2.5">
		<!-- YOUR ENTRIES HERE -->
</web-app>
And springweb-servlet contents, for now (AOP and other features will require additional xsd entries), should be put inside this:
<?xml version="1.0" encoding="UTF-8"?>
<beans xmlns="http://www.springframework.org/schema/beans"
	xmlns:xsi="http://www.w3.org/2001/XMLSchema-instance"
	xsi:schemaLocation="http://www.springframework.org/schema/beans http://www.springframework.org/schema/beans/spring-beans-2.0.xsd">
		<!-- YOUR ENTRIES HERE -->
</beans>
4 Controller Basics
4.1 Implementing Round-Trip for the Home Page
As pointed out in the lifecycle of a Spring MVC backed request, there are multiple things you need to realize a complete round-trip from request to response. You will do the following:
- Write a controller and map it to a URL in springweb-servlet.xml
- Write the view rendering JSP and map it through a view resolver in springweb-servlet.xml
Additionally, you will write a concise JSP that will redirect the browser to the home page URL. The web server does not understand Spring MVC. So it needs this JSP to begin.
4.1.1 Writing and Mapping the Controller
/**
 * Controller to generate the Home Page basics to be rendered by a view.
 * It extends the convenience class AbstractController that encapsulates most
 * of the drudgery involved in handling HTTP requests.
 */
public class HomePageController extends AbstractController
{
	protected ModelAndView handleRequestInternal(HttpServletRequest httpServletRequest, HttpServletResponse httpServletResponse) throws Exception
	{
		// the time at the server
		Calendar cal = Calendar.getInstance();
		Date now = cal.getTime();

		List<Integer> intList = new ArrayList<Integer>();
		Random random = new Random(now.getTime());

		// 10 random integers
		for (int i = 0; i < 10; ++i)
			intList.add(random.nextInt());

		// time-of-day dependent greeting
		String greeting = "Morning";
		int hour = cal.get(Calendar.HOUR_OF_DAY);
		if (hour == 12 )
			greeting = "Day";
		else if (hour > 18 )
			greeting = "Evening";
		else if (hour > 12 )
			greeting = "Afternoon";

		ModelAndView mv = new ModelAndView();
		mv.addObject("time", now);
		mv.addObject("randList", intList);
		mv.addObject("greeting", greeting);
		mv.setViewName("home");

		return mv;
	}
}
The controller class extends AbstractController that deals with the intricacies of Java Servlets. The only method required due to extending AbstractController is handleRequestInternal. You put your controller logic in this method.After setting up some data for the view to render, a ModelAndView object is used to pack the data and specify the logical view name. The data objects are tagged with names that the view can use to pull them out.
The controller completes it work by returning the created ModelAndView object that DispatcherServlet will use to select a view renderer.
Now that the controller is written, you need to tell Spring MVC in springweb-servlet.xml to use it:
<bean name="/home.htm"
	class="org.himu.springweb.co.HomePageController"/>
When a request is submitted to the server, DispatcherServlet looks in springweb-servlet.xml for a mapping of the specified URL to some controller bean. This is done by using a BeanNameUrlHandlerMapping by default. There are other mapping handlers that you can specify instead of the default.The default handler looks for a bean that has the URL as its name and gives it to DispatcherServlet.
4.1.2 Writing and Mapping a View Rendering JSP
After the controller has returned, DispatcherServlet looks for a view resolver to resolve the view name that it got from the ModelAndView object. You will use InternalResourceViewResolver for resolving view names to JSP:
<bean id="viewResolver"
	class="org.springframework.web.servlet.view.InternalResourceViewResolver">
<property name="prefix" value="/jsp/"/>
<property name="suffix" value=".jsp"/>
</bean>
What this resolver does is take the view name, prepend the prefix and append the suffix, and look for a resource with the produced name. So, if you put all your JSP files in the /jsp directory and use their main filename as logical view names then you have got an automatic mapping.Now the JSP file itself (home.jsp):
<%@ page contentType="text/html;charset=UTF-8" language="java" %>
<%@ taglib prefix="c" uri="http://java.sun.com/jsp/jstl/core" %>
<html>
<head>
	<title>Spring MVC Tutorial (Home Page)</title>
</head>
<body>
<h1>Good <c:out value="${greeting}"/>! Welcome to Spring MVC Tutorial</h1>
The time on the server is <c:out value="${time}"/>

	<b>Here are ten random integers:</b>
	<c:forEach items="${randList}" var="num">
		<c:out value="${num}"/>
	</c:forEach>

<img src="<c:url value="/images/poweredBySpring.gif"/>" alt="Powered By Spring"/>
</body>
</html>
You can use JSTL tags to access the model contents (remember ModelAndView?) and for other purposes. Get Jakarta Taglibs if you don’t have any implementation.There is nothing in the JSP that is Spring specific. The JSTL tags should be easy to understand.
You can find poweredBySpring.gif in the Spring distribution.
4.1.3 Default Page for the Web Application
So far so good, but you need to point your browser to something like http://localhost:8080/springweb/home.htm to get to the home page. This plainly defeats the purpose of having a home page altogether. You will fix that now.
Add the following entry in web.xml:
<welcome-file-list>
	<welcome-file>index.jsp</welcome-file>
</welcome-file-list>
This tells the web server to use index.jsp as the default page to display in case no specific page is requested. index.jsp will redirect the browser to the actual homepage:
<%@ page contentType="text/html;charset=UTF-8" language="java" %>
<%@ taglib prefix="c" uri="http://java.sun.com/jstl/core" %>
<c:redirect url="/home.htm"/>
4.2 Deploying springweb to Tomcat
Your web application structure should be like this:
springweb/
	index.jsp
	images/
	poweredBySpring.gif
	jsp/
		home.jsp
	WEB-INF/
		springweb-service.xml
		springweb-servlet.xml
		web.xml
		classes/
			...compiled classes here...
		lib/
			commons-logging.jar
			jstl.jar
			spring.jar
			standard.jar
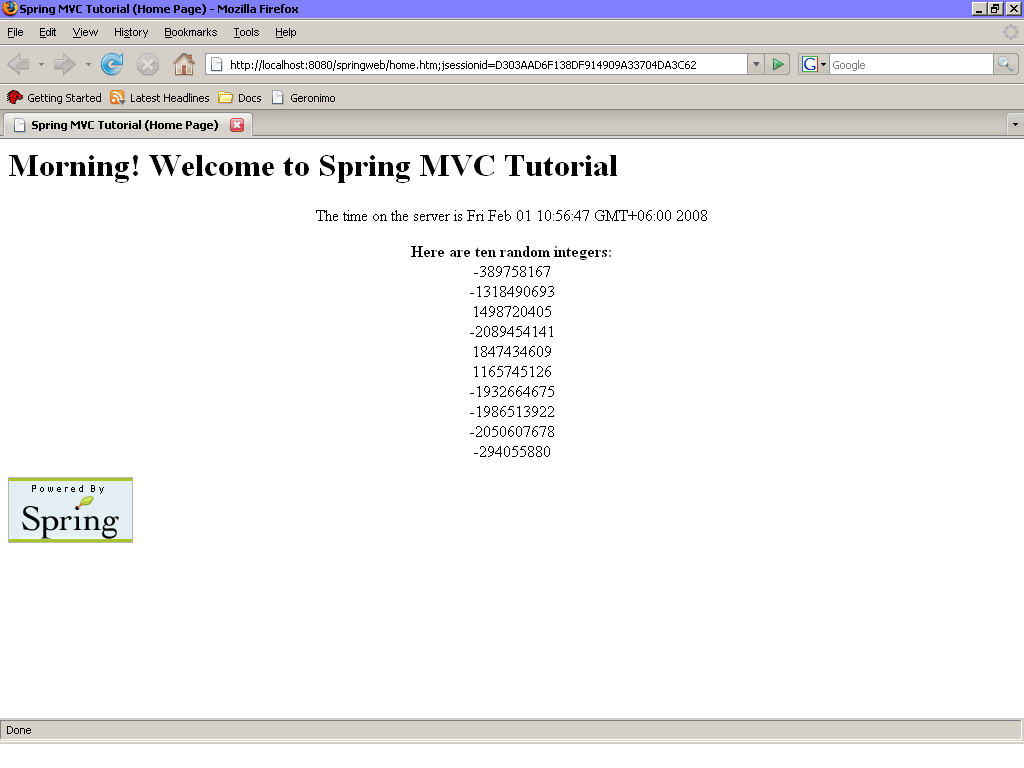
Put the entire springweb folder as show above in Tomcat’s webapps directory, start Tomcat, start your browser and point it to http://localhost:8080/springweb/.
You should be rewarded with the home page:
4.3 Mapping Controllers with Ids
HomePageController was mapped by putting the URL in the name attribute of its bean definition. The reason for this is the default mapping handler BeanNameUrlHandlerMapping. A better approach for keeping the mapping metadata in a single place and freeing controller definitions from specific URL binding is to use SimpleUrlHandlerMapping:
<bean id="simpleUrlMapping"
	class="org.springframework.web.servlet.handler.SimpleUrlHandlerMapping">
<property name="mappings">
<props>
<prop key="/home.htm">homePageCo</prop>
			</props>
		</property>
</bean>
You don’t need to give URL names to your controllers now:
<bean id="homePageCo"
	class="org.himu.springweb.co.HomePageController"/>
5 Handling Forms
AbstractController is good for hiding Java Servlet specifics but they don’t free you from dealing with raw HTTP requests and responses. Spring MVC gives you AbstractFormController and SimpleFormController that can deal with form display, submission, and processing. SimpleFormController lets you configure various aspects through XML while the former doesn’t.
To understand form processing in Spring MVC, you will add a loan calculator to your web application. For this, you need:
- A page to be displayed where the user inputs the required parameters (form view)
- A JavaBean where the input parameters will be mapped (form object)
- An input validating entity for user mistakes (validator)
- A page to display the results for a successful execution with valid input (success view)
5.1 SimpleFormController
It is better if you understand the workflow of the SimpleFormController. Here is the workflow adapted from Spring API documentation in relevance to this tutorial:
- Receive a GET request for the form input page
- Instantiate the form object, i.e. the binding object for parameter mapping
- The form view is sent to the browser for user input
- Use submits form (using a GET with parameters or a POST)
- Populate the form object based on the request parameters (applying necessary conversions from String to
appropriate object type); in case of binding errors, they are reported through an Errors object - If binding is ok and a validator is attached then it is called to validate the form object; in case of errors,
they are reported through an Errors object - If errors are present associated with the model then form view is resent to the browser
- If validation passes then a chain of onSubmit() methods is called (one of which should be overridden) that
returns the success view by default
There are multiple submit processing methods of which one you must override depending on the task at hand. In general, override
- ModelAndView onSubmit(HttpServletRequest, HttpServletResponse, Object, BindException) if you want complete
control on what to return - ModelAndView onSubmit(Object, BindException) if you want custom submission handling but don’t need to work with
request and response objects - ModelAndView onSubmit(Object) if you need nothing more than the input but may return a custom view
- void doSubmitAction(Object) if you don’t need to determine the success or error view
5.2 Writing Your Form Controller
To makes things comprehensible, first write the controller’s bean definition:
<bean id="loanCalcCo"
	class="org.himu.springweb.co.LoanCalcController">
<property name="formView" value="loanCalc"/>
<property name="successView" value="loanCalcResult"/>
<property name="commandName" value="loanInfo"/>
<property name="commandClass" value="org.himu.springweb.demo.LoanInfo"/>
<property name="validator">
			<bean class="org.himu.springweb.demo.LoanCalcValidator"/>
		</property>
</bean>
You need to add the appropriate mapping also:
<bean id="simpleUrlMapping"
	class="org.springframework.web.servlet.handler.SimpleUrlHandlerMapping">
<property name="mappings">
<props>
<prop key="/home.htm">homePageCo</prop>
<prop key="/loancalc.htm">loanCalcCo</prop>
			</props>
		</property>
</bean>
formView specifies the name of the view used to collect input and to return back in case of errors. successView is returned by default if no errors occur. commandClass specifies the model object to use against the input parameters and its instance is given a name through commandName. If a validator is present then DispatcherServlet will use it to validate the input data before passing on to the form controller.Note that both input form request and input form submission is handled by the same URI. If the browser requests /loancalc.htm without any parameters then the ‘form view’ is returned; otherwise the form processing pipeline is executed.
So, here is LoanCalcController’s implementation:
public class LoanCalcController extends SimpleFormController
{
	protected void doSubmitAction(Object o) throws Exception
	{
		LoanInfo li = (LoanInfo) o;

		double P = li.getPrincipal();
		double i = li.getApr() / (li.getPeriodPerYear() * 100.0);
		int n = li.getYears() * li.getPeriodPerYear();

		double A = P * i / (1 - Math.pow(1 + i, -n));

		li.setPayment(A);

		List<RepaySchedule> repayments = new ArrayList<RepaySchedule>();

		int pno = 1;
		while ((P - 0.0) > 0.001)
		{
			double B = P * i;
			double paidP = A - B;
			P = P - paidP;
			repayments.add(new RepaySchedule(pno, paidP, B, P));
			++pno;
		}

		li.setSchedule(repayments);
	}
}
As you can see, there is absolutely nothing special other than extending SimpleFormController and modifying the model object. Of course, there will be some work to do for not-so-trivial cases.
5.3 The Model Objects
LoanInfo is as follows:
public class LoanInfo
{
	// IN
	private double principal;
	private double apr; // annual percentage rate
	private int years;
	private int periodPerYear;
	// OUT
	private double payment; // periodic payment amount
	private List<RepaySchedule> schedule; // repayment schedule

	// ... getters and setters except for 'schedule'

	public List<RepaySchedule> getSchedule()
	{
		return schedule;
	}

	public void setSchedule(List<RepaySchedule> schedule)
	{
		this.schedule = schedule;
	}
And here is RepaySchedule’s implementation:
public class RepaySchedule {
	private int paymentNo;
	private double principal;
	private double interest;
	private double outstanding;

	// ... getters and setters

	public RepaySchedule(int paymentNo, double principal, double interest, double outstanding)
	{ // ... all-argument constructor }
}
5.4 Model Validator
The validator specified in the controller’s bean definition should implement the Validator interface provided by Spring. The support method must return true for model object classes which this validator validates. The validate method gets called with the actual model object and an Errors object through which validation errors can be registered.
public class LoanCalcValidator implements Validator
{
	public boolean supports(Class aClass)
	{
		return aClass.equals(LoanInfo.class);
	}

	public void validate(Object o, Errors errors)
	{
		LoanInfo li = (LoanInfo) o;

		if (Double.compare(li.getPrincipal(), 0.0) <= 0)
			errors.rejectValue("principal", "error.invalid.principal", "Principal invalid");
		if (Double.compare(li.getApr(), 0.0) <= 0)
			errors.rejectValue("apr", "error.invalid.apr", "APR invalid");
		if (li.getYears() <= 0)
			errors.rejectValue("years", "error.invalid.years", "Number of years invalid");
		if (li.getPeriodPerYear() <= 0)
			errors.rejectValue("periodPerYear", "error.invalid.periodPerYear", "Period invalid");
	}
}
Each call to rejectValue(fieldname, keycode, defaultmsg) above adds a message resource key against a field/attribute of the model object. This allows localized error messages and selected placing in the view (as you will shortly see). The default message is displayed in case no message resource is found. This will be the case as I haven’t added any resources yet.
5.5 Input and Result JSP Files
All that remains is to write the JSP files. One JSP is needed for the input form and validation messages; other for displaying the result. We could have merged them into one but won’t do that here. First we write the form view JSP, loanCalc.jsp:
<%@ page contentType="text/html;charset=UTF-8" language="java" %>
<%@ taglib uri="http://java.sun.com/jsp/jstl/core" prefix="c" %>
<%@ taglib uri="http://www.springframework.org/tags/form" prefix="form" %>
<%@ taglib uri="http://www.springframework.org/tags" prefix="spring" %>
<html>
<head>
	<title>Calculate Loan</title>
</head>
<body>
<center>
	<!-- one way to display error messages – globally -->
	<spring:hasBindErrors name="loanInfo">
<h3>You have errors in your input!</h3>
<font color="red">
			<c:forEach items="${errors.allErrors}" var="error">
				<spring:message code="${error.code}" text="${error.defaultMessage}"/>
			</c:forEach>
		</font>
	</spring:hasBindErrors>

		<!-- note second way of displaying error messages – by field -->
		<form:form commandName="loanInfo" method="POST" action="loancalc.htm">
			Principal: <form:input path="principal" /><form:errors path="principal" />
			APR: <form:input path="apr" /><form:errors path="apr" />
			Number of Years: <form:input path="years" /><form:errors path="years" />
			Periods Per Year: <form:input path="periodPerYear" /><form:errors path="periodPerYear" />
			<input type="submit" title="Calculate" />
		</form:form>

</center>
</body>
</html>
The <form:form> tag binds the model/form object with the input form. You specify the form object name (matching that in springweb-servlet.xml) using the commandName attribute and the action attribute refers to the submit URI. Note that no special tag is needed for rendering the HTML submit button.The Errors object from earlier discussion is exposed by Spring MVC as the errors object in the view. I use <spring:hasBindErrors> to test if errors are indeed present and if so then iterate over the error list (referenced by JSTL EL expression ${errors.allErrors}) to display them. <spring:message> uses the code attribute to look for a message key in the message resource and in case of failure uses the text attribute to display an alternate message. This technique is useful if you want to list all error messages in a single location. But if you want to reference errors specific to input fields (i.e. bound form object attributes) then using the <form:errors> tag is better. It is also less verbose than <spring:message>.
The success view is rendered using the following JSP, loanCalcResult.jsp:
<%@ page contentType="text/html;charset=UTF-8" language="java" %>
<%@ taglib uri="http://java.sun.com/jsp/jstl/core" prefix="c" %>
<%@ taglib uri="http://java.sun.com/jsp/jstl/fmt" prefix="fmt"%>
<html>
<head>
	<title>Calculate Loan Result</title>
</head>
<body>
<center>

		The installment size is: <fmt:formatNumber value="${loanInfo.payment}" type="currency"/>
<table border="1">
<tr>
<td width="10%">Payment No.</td>
<td align="right" width="30%">Principal</td>
<td align="right" width="30%">Interest</td>
<td align="right" width="30%">Outstanding Principal</td>
</tr>
<c:forEach items="${loanInfo.schedule}" var="entry">
<tr>
<td>${entry.paymentNo}</td>
<td align="right"><fmt:formatNumber value="${entry.principal}" type="currency"/></td>
<td align="right"><fmt:formatNumber value="${entry.interest}" type="currency"/></td>
<td align="right"><fmt:formatNumber value="${entry.outstanding}" type="currency"/></td>
</tr>
</c:forEach></table>
</center>
</body>
</html>
This JSP does not warrant much discussion as there are no Spring specific tags. The only thing of interest here is the JSTL <fmt:formatNumber> tag. I used it to display the figures in currency format.
5.6 Wrap-Up
Place the JSP files in the jsp folder, compile the classes into WEB-INF/classes, edit springweb-servlet.xml as appropriate and deploy. Hit the URL http://localhost:8080/springweb/loancalc.htm and test.
The input page looks like this:

And the result:

Source Code Download
The source code of this tutorial is available as an IntelliJ IDEA project. It also contains a build.xml file that can be used with Apache Ant. The required jars are not included as they can be obtained easily:
Jakarta Implementation of JSTL 1.1 can be obtained here.
Commons Logging can be obtained here.
Finally, to get updated on the post use ![]() .
.


This is a good one for beginner.
Tandabany
November 30, 2007 at 6:13 pm
[…] Posted by mhimu on December 10, 2007 This is my second installment of the tutorial. For the first part, see Spring MVC Tutorial. […]
Spring MVC Tutorial, 2 « Himu’s Attempt at Blogging
December 10, 2007 at 3:13 pm
Lots of hours looking for a simple tutorial that explains the flow involved in Spring and how the different concepts are related. Let me tell you this is really an excellent job. Simple yet complete. You saved my project THANKS!!!!
Serge
December 21, 2007 at 10:49 am
nice work there. now i finally understand how the spring works. i’ve been finding these all the while and u are the best so far. TWO THUMBS UP !!
kelvin
December 21, 2007 at 3:09 pm
I must say, you saved my life !
Why didn’t i found your article before? Its best, excellent, complete and simple !
Very well done, and best wishes for future !!!
Bhaskar
December 25, 2007 at 12:38 pm
I’m glad that this tutorial helped you guys 🙂
Hope to write some more when I get the time.
mhimu
December 26, 2007 at 10:33 am
this is a very good tutorial. Thanks mhimu!
Only one suggestion: if you could include the source code as a zip file it could go a long way to help beginers.
Samjoandco
December 31, 2007 at 1:19 am
I have a few questions, can you tell me which parts of your code go in the springweb-service.xml, web.xml, and the springweb-servlet.xml?
Also my setup in eclipse is a little different, there is a folder called web-content right above of WEB-INF, and right below the springweb folder. You say to put the classes in a folder called classes, but when I create a class it ends up in the eclipse hierarchy right below the springweb folder, not in the classes folder.
Andy
January 1, 2008 at 10:46 am
Hi Andy, my apologies for not providing downloadable sourcecode. I am recently switched to a new job and haven’t got much time for ammendments. But I will try. For now hope the following helps:
1. springweb-service.xml has been used just as an example to show that you can use multiple metadata files.
2. The code in section 3.2 and 3.3 should be wrapped by the first code block in 3.4 (place them after the line). Also put the first code block of 4.1.3 in web.xml.
3. All other configuration data goes into springweb-servlet.xml.
4. I use IntelliJ IDEA. But the structure I’ve shown is for the deployed application, not any the project structure.
4.1. Your Eclipse project is configured to treat the project folder as your source directory for Java classes. It will copy the .class and .jar files in the appropriate locations during builds (which is automatic by default). Please note the package definitions in the configuration files. I haven’t included them in the Java sources. e.g. name the the HomePageController as ‘org.himu.springweb.co.HomePageController’ during creation.
4.2. JSPs, images, etc. goes into web-content. Again, Eclipse will copy them appropriately when deploying the application.
Hope this helps a bit.
mhimu
January 3, 2008 at 4:02 pm
4-man robbery gang is on
While he talked, the driver said he noticed his $1500 Pioneer navigation system in the burglar’s hand. The driver called
ford navigation system
January 7, 2008 at 6:59 pm
Another good Spring MVC tutorial, with downloadable source code and screenshots:
http://maestric.com/wiki/doku.php?id=java:spring
Alex Summers
January 11, 2008 at 1:11 am
Thanks so much for posting this!!! I’ve got the task of converting from Struts to Spring MVC and it is a bit confusing. This cleared up a lot!
Paul
January 18, 2008 at 2:43 am
Hi,
I have a question. In your post you mention “One JSP is needed for the input form and validation messages; other for displaying the result. We could have merged them into one but won’t do that here.”
How do i merge two controllers one for input form controller and other for displaying the data on on one JSP.
Also is it possible to have more than one controller for a form. I have input data from one bean and on the same page I want to display a table from a different bean. Is this possible?
Thanks
adii28
February 14, 2008 at 4:12 am
Hi,
I have a question. In your post you mention “One JSP is needed for the input form and validation messages; other for displaying the result. We could have merged them into one but won’t do that here.”
How do i merge two controllers one for input form controller and other for displaying the data on on one JSP.
Also is it possible to have more than one controller for a form. I have input data from one bean and on the same page I want to display a table from a different bean. Is this possible?
Thanks
adii28
February 14, 2008 at 4:14 am
Hello Adii28,
First of all, sorry for being late.
Merging two JSPs is nothing special. You point both the formView and successView to the same view name. You have only one controller whether you have separate views or a merged view.
You cannot have more than one controller for a form but you can use a MultiActionController to combine functionalities of multiple controllers that work on the same form.
If you want to use beans other than the command object (input bean), add them to the request or session scope in your controller logic and access from the JSP. For SimpleFormController, override onSubmit(HttpServletRequest, HttpServletResponse, Object command, BindException errors) – that will give you access to both the request and session (through request).
mhimu
February 24, 2008 at 11:59 am
Hello Himu, or maybe someone else reading this tutorial,
I am a bit new at this, but I got most of the tutorial working (up to 4.2) And it works – except the taglib stuff is not working (I’m also new to taglibs). I have included both jstl.jar and standard.jar to the library and classpath. Is there anything else I will need to do to not have the website show up like Good ${greeting}! (It is really ignoring the fact that it’s supposed to use the jstl).
Thanks in advance for answering such a newbie question.
barry
February 25, 2008 at 2:04 am
Hi guys!
I’ve added screenshots and a source code download link for convenience. Hope this will help you to some extent.
@Barry:
${greeting} is in JSTL EL (expression language) syntax. For this to work, you need JSP 2.0 compliant rendering in a JSP 2.0 compliant server. Tomcat 5.5+ should do. And have you put this at the top of your web.xml:
Be sure not to use JSTL 1.0.
Maybe this will help.
mhimu
February 25, 2008 at 10:34 am
Hi, can anyone post a sample which handles a master-detail screeen such as purchase order – line item, shipment – line item, manager – employee, screen.
both parent and child objects can be edited in the same screen.
the model could be:
parent object such as Shipment containing a Set of Products to be shipped:
class Shipment {
…fields for Shipment
Set products;
}
class Product {
…fields for the product
}
murgan
March 20, 2008 at 9:24 pm
dear sir,
can u post some diagram as to the spring MVC flow, similiar to the struts flow diagram , that will help this whole tutorial could not make sense without it
struts
March 23, 2008 at 1:32 am
Great posting! I have been searching for a simple but complete walk-through of Spring MVC + forms. This was excellent – I will put it to immediate use.
Todd
April 8, 2008 at 11:34 am
Hi,
it is an excellent article.
I do have one question which if could ansnwer will solve my big problem.
I have form:select tag on my jsp with multiple selection possible.
The form backing object for this jsp has one field for this select box on jsp.
When JSP is rendered and if this select field of form-backing object has value then jsp is deplayed with that value selected on SELECT drop down box.
My question is
how can I set my form-backing object so that jsp can show more than one values selected on drop down box.
Thanks.
Chirag
chirag
May 2, 2008 at 10:32 pm
Is a multiple-selection drop-down box user-friendly? I have my doubts. I have to disappoint you in this regard that I do not have any solution to your problem.
You can use a list box for multiple selection.
A multiple-selection UI component will need an array/list-based backing field.
Maybe you can use client-side javascript to achieve your goal.
Best wishes.
mhimu
May 4, 2008 at 9:33 am
The web.xml you have uploaded is not validated by XMLSpy
vassilis
June 7, 2008 at 7:36 pm
Dear Vassilis
Thank you for your feedback, but I checked the web.xml with XMLSpy and it passes fine. Also, the programs are running ok.
Regards.
mhimu
June 9, 2008 at 10:05 am
Thank You Very much Mhimu. This is a great one. Its rather better if u specify the file names below the screenshots too.
Thanks & Regards !
Uditha
Uditha Madumal
June 12, 2008 at 8:44 pm
Thanks MHimu…very good one for beginners
Muneender
June 15, 2008 at 12:13 pm
Hi,
In 4.1.1 WordPress puts html code for a smiley in the source code. It may confuse someone.
Regards,
Maciek
Maciek
July 2, 2008 at 6:37 pm
Dear Maciek,
Thank you very much for your correction. I’ve fixed the issue 🙂
Regards
mhimu
July 3, 2008 at 10:47 am
Good work. Very useful.
Karol
July 16, 2008 at 5:53 pm
Excellent tutorial, thank you very much!
vkroz
July 21, 2008 at 10:39 am
Hello Sir,
greetings,
This is very simple and nice tutorial. i was searching for such a smart tutorial. now i can start my application…..
Thanks
ashish
July 31, 2008 at 5:40 pm
Hai,
I can this is a good reference for beginners
who can get theoretical& practical knowledge of Springs
MVC
But please provide a control/data flow architecture of the Spring
framework with which one can get complete & overall idea of
Springs MVC
Thank You
Jagdeesh
jaggu
August 5, 2008 at 12:15 pm
Hi All 😀
I tried this tutorial but I also encounterd Mr. Barry’s problem.
I then tried the instructions in the link you send to Mr. Barry
but it still won’t work.
I am using Tomcat 5.5 which should be compatible with jsp 2.0
Any help will be greatly appreciated
Thanks 😀
Amer
August 8, 2008 at 1:00 pm
Dear Amer
Have you tried the source code download provided at the end?
mhimu
August 10, 2008 at 10:22 am
Excellent introduction at first sight. Straight to the point. I’ll definetely use it as a starting point for my first Spring MVC project. Well done Mhimu.
6itiger
August 23, 2008 at 8:18 pm
Good Job dude . Just what a beginner needs to get a hang of what is happening ..
Kumar
August 23, 2008 at 9:45 pm
Nice tutorial. Really explained things well. Thank you!
Chris
August 27, 2008 at 12:40 am
Thanks for the tutorial , its good and solved my problem . And one more query mhimu — how to do server-side and client-side validations – any suggestions (will u suggest any links for this) ,Thank u
Bonu Anil
August 28, 2008 at 1:25 pm
You’re welcome Bonu. For validation, I think you can look at this article
mhimu
August 28, 2008 at 1:34 pm
Goog Article. Tells in the simplest way and covering all most the required stuff…Great..
Ramesh Packirisamy
September 7, 2008 at 1:05 am
I have tried using ‘code’ and ‘pre’ tags but the html code will not show up. I apologize for the several postings that have resulted and it will be great if they can be removed. I was trying to say:
1. Use …taglib prefix=”c” uri=”http://java.sun.com/jstl/core”… instead of …taglib prefix=”c” uri=”http://java.sun.com/jsp/jstl/core”…
2. Use …c:out value=”${entry.paymentNo}”… instead of …${entry.paymentNo}…
Nestor Urquiza
September 16, 2008 at 3:55 am
Nestor, thank you very much for your comment. I googled about the issue and found this discussion on the sun forums. Specifically, have a look at comment #3 by evnafets.
Hope this clarifies the issue.
Thanks again.
mhimu
September 16, 2008 at 9:45 am
Thank you for this nice introduction to Spring MVC!
Nestor Urquiza
September 17, 2008 at 6:28 am
thanks for you useful tutorial.
thientran
September 21, 2008 at 12:24 pm
I am really Thankful for providing such a nice intro on Spring MVC.
Sarada
September 22, 2008 at 8:10 pm
If after reading this excellent introduction you are looking for more Convention over Configuration for SpringMVC take a look at http://code.google.com/p/nestorurquiza/wiki/SpringMVCTutorial. I have put there my findings about it so far.
Nestor Urquiza
September 24, 2008 at 3:36 am
very useful tutorial
rashmi
October 2, 2008 at 4:40 am
Hello, thank you for your tutorial, i think that is best tutorial for the SpringMVC 🙂
Marek
October 8, 2008 at 4:03 pm
Hi Hhimu,
Good work, very useful tutorail on spring mvc.
It would be great, If you can explian form invalid submit like
refresh, back button… along with code example.
Thanks,
http://www.studywell.info
studywell
October 14, 2008 at 1:26 pm
Hello,
Good Article!
I am new to Spring MVC and took this article as learning. I am stuggling with one issue.
When depolying the application I am getting following exception:
java.lang.ClassNotFoundException: org.springframework.web.multipart.MultipartResolver
at org.apache.catalina.loader.WebappClassLoader.loadClass(WebappClassLoader.java:1358)
at org.apache.catalina.loader.WebappClassLoader.loadClass(WebappClassLoader.java:1204)
at java.lang.ClassLoader.loadClassInternal(ClassLoader.java:319)
…..
I am using JBOSS 4.2.3 GA app server.
Thanks for your help in advance.
Lucky.
Lucky
October 22, 2008 at 8:49 am
Lucky,
Sorry, I haven’t tested the app in JBoss. Have you tried everything step by step? How are you packaging the app? Have you included the required jars? You can try to build the war from the download provided at the end of the tutorial under ‘Source Code Download’. Please try it and if it works the compare with what you did. 🙂
mhimu
October 22, 2008 at 10:43 am
Hi Mhimu,
Yes I followed step by step.
Th error started at step 4.2 Deploying springweb to Tomcat
My web application structure looks like:
SpringMVC/
index.jsp
images/
poweredBySpring.gif
jsp/
home.jsp
WEB-INF/
springweb-service.xml
springweb-servlet.xml
web.xml
classes/
…my classes…
lib/
commons-logging.jar
jstl.jar
spring.jar
standard.jar
Only think which I think could be different will be the version of jars. Could you please upload the jar files you used in your application.
Thanks,
Lucky
Lucky
October 22, 2008 at 11:01 pm
My compliments, this tutorial should be referenced in spring website as starting point to understand MVC basics.
MrPatol
October 23, 2008 at 1:14 am
Hello,
As I suspected, it was wrong version of one of the jar file (spring-webmvc.jar). Its fixed now.
Thank you,
Lucky.
Lucky
October 23, 2008 at 4:53 am
Glad that it finally worked for you.
mhimu
October 23, 2008 at 10:03 am
@MrPatol: thanks for the complement 🙂
mhimu
October 23, 2008 at 10:06 am
This is great for a newbie to learn to use Spring,Spring MVC
Sanath
October 26, 2008 at 5:29 pm
Bravo, man. THANK YOU! You saved me a lot of struggle.
Cody Burleson
November 7, 2008 at 9:42 am
Hey mhimu,
Any way to have an RSS/atom subscription to this page? That would help, I am monitoring it using changedetection.com but then I get notified by simple changes in the layout of the page rather than what I need (posts and content)
Best regards
nestorurquiza.com
Nestor Urquiza
November 9, 2008 at 2:25 am
Hi,
I just downloaded your source code and added it to the webapps directory in directory, but when I try and run it, I can error stating that the springweb resource is unavailable, can someone please help? I added jstl.jar, spring 2-0.6 jar, spring-webmvc.jar, commons-logging-1.0.4 jar. Am I missing something or not doing something right
Jack
November 9, 2008 at 7:25 am
Hey,
Good tutorial but for the HomePageController i get “The constructor ModelAndView() is undefined”, what gives?
I have copy pasted from the source i downloaded, what is wrong?
/J
Johan
November 10, 2008 at 9:35 pm
Jack and Johan
I think you both have the library versions wrong. You need Spring 2.5, commons-logging 1.1 and JSTL 1.1 and they need to be put in WEB-INF/lib.
mhimu
November 11, 2008 at 1:10 pm
Thank’s a lot for the tutorial 🙂
However i got a problem with this JSTL
I got an error that said Double cannot be parsed to Number regarding to the tag above.
paula
November 11, 2008 at 1:35 pm
@nestor: i’ve added a RSS link to this post at the end.
@paula: could you please be more specific?
mhimu
November 11, 2008 at 1:51 pm
I got an error regarding to this tag: fmt:formatNumber value=”${entry.principal}” type=”currency”
From the errors shown in the page it seems that the taglib formatNumber can’t format the data with type double
paula
November 11, 2008 at 3:26 pm
I got an error regarding to the fmt tag
From the errors shown in the page it seems that the taglib formatNumber can’t format the data with type double
paula
November 11, 2008 at 3:30 pm
Dear Paula,
I see no apparent reason behind the error. Please check the following:
1. JSTL version
2. Web-app version in web.xml
3. Locale
4. JDK
I searched the net for you but couldn’t find a similar case.
mhimu
November 12, 2008 at 12:51 pm
I use JSTL which downloaded from the link you provided,and I set JDK 1.5 as compiler in eclipse.
I have followed the configuration according to this tutorial, the
home.htm was working fine however the loancalc.htm was unable to display the LoanInfo properties when displaying the successView, when i changed fmt:formatNumber value=”${entry.principal}” type=”currency” to c:out value=”${entry.principal}” it didn’t display the values.
Do i have to use ModelAndView to store values in LoanCalcController?
Thanks for the help 🙂
paula
November 13, 2008 at 1:54 pm
it truly fulfill the beginners’ need.it helped me a lot.i need to know some more.
can u plese post a little advance tutorial on spring mvc?
thnx…
baishakhi
November 14, 2008 at 12:54 pm
Thanks a lot, this helped me understand the basics in a very shrt time frame.
Excellent post!
Prasanna Shroti
December 1, 2008 at 11:21 pm
Hi Mhimu,
I have referred this article, that is very helpful for me.
Thanks
Mohd Juned
December 12, 2008 at 4:47 pm
Great tutorial (clear & precise), thank you!
John
December 15, 2008 at 10:13 pm
Awesome! Best tutorial I’ve seen!
Josh
January 7, 2009 at 9:10 pm
I guess something went wrong with the page generation. The whole home.jsp-code in 4.1.2 is messed up and all c:out tags are split into .
Thomas
January 14, 2009 at 6:28 pm
And in the comment we have the reason for it. The wordpress engine renders :*o (without *) into a smiley :o, even if it’s in code tags.
Thomas
January 14, 2009 at 6:29 pm
Did you ever think about installing a print plugin in this blog? I would love to archive this article and print it, but that’s just not possible in a comfortable way and it’s a matter of barrier freeness to offer a print option on web pages.
Michael
January 14, 2009 at 7:02 pm
I also have error related with fmt tag:
In <formatNumber>, value attribute can not be parsed into java.lang.Number: “${loanInfo.payment}”
dragaN
January 20, 2009 at 8:15 pm
You should put war file for download because of error.
dragaN
January 20, 2009 at 8:27 pm
[…] […]
Need to learn Spring? - Java Forums
January 28, 2009 at 10:32 am
Thanks Mhimu…for a nice tutorial….tis is really good for beginners.
We are also waiting for few more tutorials from you on Spring MVC , where in we want you to explain concepts in depth.
Once again, thanks.
Mouna
January 29, 2009 at 8:49 pm
This is a really good tutorial for getting a person started with Spring. Thank you!!
DS
February 4, 2009 at 3:33 am
When user clicks on “Submit Query” without providing any input, error messages are shown along with exception. To overcome this the following lines can be added into ‘validate’ method of ‘LoanCalcValidator’ class.
ValidationUtils.rejectIfEmpty(errors, “principal”, “principal.empty”);
ValidationUtils.rejectIfEmpty(errors, “apr”, “apr.empty”);
ValidationUtils.rejectIfEmpty(errors, “years”, “years.empty”);
ValidationUtils.rejectIfEmpty(errors, “periodPerYear”, “periodPerYear.empty”);
Raghavendra
February 11, 2009 at 3:13 pm
hi, I have a question about model objects, if there two models displayed in the same page, such as LondInfo and Borrower are in the same page, the same form, how to get both model objects from doSubmitAction(Object o)? All the tutorials on the web I saw so far only discussing one model object in the form. But in the real world, there are always multiple model object in one form, how to handle this sutiation? thanks
Lorence
February 28, 2009 at 5:21 am
In fact, you don’t need to deal with multiple model objects. Wrap up all your objects into a single one and use that as the model object. If you notice, I’ve done exactly that same thing — a list of RepaySchedule’s in LoanInfo.
Hope that helps.
mhimu
March 1, 2009 at 11:55 am
Nice article/blog thanks.
TEST
March 27, 2009 at 12:56 am
in loanInfo.schedule, can form tag use instead of foreach? while in struts it uses nested tag. how could we bind arraylist of object without using spring:bind instead use form tag…
allen
April 1, 2009 at 3:00 pm
Hi Himu,
Thnaks for the tutorial. On accessing home page $greeting seems not to work or for that matter any of tags is not working. I have put jstl.jar, standard.jar in lib. I am using jdk1.6 I aslo tried to put tlds file in WEB-INF folder but of no use. Please help.
Rahul Kumar
April 2, 2009 at 8:02 pm
why taglib directive with uri set to tlds’ url(as given by you) are not working? I had to download required tlds, put in WEB_INF folder and change uri to their local addresses.
Rahul Kumar
April 3, 2009 at 2:10 am
Hi Himu,
Thank you very much for the tutorial. What next after this, I mean what are the other topics to learn after this.
Thanks
Sree
SpringHelp
April 6, 2009 at 1:24 pm
Thanks Himu,
A concise tutorial!
devael
April 17, 2009 at 5:38 am
Thanks Himu,
nice one, wish you could up with some more tutorials on spring mvc such as multiactioncontroller
Mehmood
April 21, 2009 at 8:19 am
Hi,
I think we can make use of annotation based request mapping to make the things easy.
Vijay
April 25, 2009 at 1:26 pm
This is really a nice write up I have ever seen.
Please keep doing such a great work, which will help people like us.
Thank you again !
Tanmay Parikh
April 27, 2009 at 12:39 am
Excellent and clear tuto with details-example. Download links are given. Thanks. I would love more to come from the same author. One minor thing I wonder why war file was not executed by target all in build.xml?
Minh
May 6, 2009 at 3:38 am
Very nice article! Thanks for taking the time to write this up!
Jay
May 8, 2009 at 11:54 pm
Thanks man! You helped make things a lot clearer. I spent hours reading through it.
Johnny Boy
May 14, 2009 at 9:32 pm
thank you very much !!!!
simone
May 15, 2009 at 7:31 pm
Great stuff. Here is an other Spring MVC Tutorial. Spring MVC Tutorial
John
May 16, 2009 at 10:24 pm
This is a good document. I have gone through it and have got understanding of Spring MVC.
Sunil
May 20, 2009 at 6:27 pm
This is a good document. I have gone through it and have got quick understanding of Spring MVC.
Sunil
May 20, 2009 at 6:28 pm
THANKS… REALLY GOOD TUTORIAL
vijay
July 4, 2009 at 5:22 am
Excellent work!!
I have used Spring MVC 2 years back, and I remember it was real tough to learn it first time without any good tutorial. now need to use again and i wanted to refresh my concepts!! I could do it faster using this tutorial.
Thanks!!!
Ami
July 7, 2009 at 9:30 pm
Hi,
Could you please upload a sample project which can handle multiple submit action (ex:save, edit, delete) by one controller.
Ran
July 8, 2009 at 1:26 am
[…] https://mhimu.wordpress.com/2007/11/27/spring-mvc-tutorial/ […]
Spring MVC tutorial « Business, Service and Network Management
July 13, 2009 at 10:07 am
Your turotial is excellent one. Very useful. If another Himu google it today and see it he will stop creating a new turotial for spring MVC.
We are waiting for your next validation and tiles tutorial using Spring. Can you please write it on your convenience and get rid of us to search in Google.
Thanks Brother.
nivas
July 15, 2009 at 10:06 pm
THX a lot!! Very useful tutorial!
Peter
July 22, 2009 at 8:21 pm
Very useful tutorial, I was looking for such a tutorial & am very glad that i found this. helped me a lot….
Thanks……….
Prasath
July 26, 2009 at 9:43 pm
Usually though I read lot of Article,I never leave a comment.This time,I just want to say thank you.
arul
August 4, 2009 at 4:17 pm
Hi,
Thanks for this nice and detail help.
Hope to read on these topics soon in near future.
guddu
August 8, 2009 at 10:14 pm
This was an excellent tutorial on getting started with Spring MVC!! Thank you very much for sharing this knowledge…
One piece of code, however, that prevented me from successfully running the application was the following syntax in loanCalc.jsp that generated errors:
Principal:
Using some help from Google, I found the following alternate syntax that resolved the issue. Not sure if other folks ran into this same problem, but I thought I’d post here to save someone hours of frustration.
Principal:
Conor
August 10, 2009 at 8:47 am
Not sure why I couldn’t paste the code in my last note so I’ll try one more time..
The error was occuring at:
Principal: form:input path=”principal”…
What I discovered (which I can’t paste here?) was that you had to close the statement with
Conor
August 10, 2009 at 8:51 am
less than sign, forward slash, form, colon, errors, less than sign..
Good luck..
Conor
August 10, 2009 at 8:53 am
Thanks for this nice and working intro to spring 2.5..
that’s what I was looking for..
Thanks a lot 🙂
syr
August 30, 2009 at 6:11 pm
Nice article!!!
arnab
August 31, 2009 at 5:23 am
Thanks for sharing.
It’s really a good article!
babyincar
September 4, 2009 at 1:34 pm
Thank you for writing this. I managed to follow it without much problem using Netbeans 6.7.1.
P
September 8, 2009 at 2:50 am
This is really a useful tutorial. You may have to go deeper into the MVC API, to learn more about different controllers.
Lalith
September 8, 2009 at 10:52 pm
Excellent tutorial!!! So easy to understand the big picture and how to use them right away. Thank you so much for this post!!!
yupi
September 14, 2009 at 11:48 pm
This tutorial is too good and will be really useful to all the beginners who wants to use Spring MVC…
selva
September 16, 2009 at 2:52 pm
This tutorial totally rocks! I was away for a year and came back to it and now I love it even more.
laker200
September 19, 2009 at 8:07 pm
I couldn´t get the tutorial up and running using the described config. The problem is the servlet version 2.5 which only works (see: http://www.mularien.com/blog/2008/04/24/how-to-reference-and-use-jstl-in-your-web-application/) with jsp 2.1 and jstl 1.2. I experimented (and swore alot) until I realised that tomcat 5.5 (http://tomcat.apache.org/) only supports servlet 2.4 and jsp 2.0.
Tomorrow I´ll try it with tomcat 6.
PLEASE update the config. info. – cost me several hours….
Apart from that – great tutorial
MarkWil
October 1, 2009 at 9:43 pm
very nice tutorial
jack
October 3, 2009 at 10:53 pm
Very good tutorial, thanks!
Cheah
October 14, 2009 at 8:21 am
Great job explaining Spring MVC for beginners, many thanks for this tutorial.
lkanan
October 31, 2009 at 7:13 pm
Good Source for beginners, Thanks!.
kolan
November 4, 2009 at 11:05 pm
Thanks a lot. It rockzzzz.
Good one for the beginners.
Dinesh
November 12, 2009 at 8:25 pm
Great tutorial – thanks for this.
Al
November 14, 2009 at 6:07 pm
[…] introduction to Spring MVC in particular, see Spring MVC Tutorial and Spring MVC Tutorial […]
Spring MVC Tutorial – Hibernate Integration « Himu’s Attempt at Blogging
November 16, 2009 at 2:44 pm
you did a great job with this tutorial
Ary
November 23, 2009 at 5:15 am
Very nice tutorial indeed.
Arpita
December 21, 2009 at 6:48 pm
this is really a good tutorial!
parvez
January 12, 2010 at 6:06 pm
thanks .. a great tutorial really
Ashish
February 5, 2010 at 4:25 pm
Thanks for this tutorial. However, I have some questions regarding these controllers, and JSP forms. I have one controller class to populate the corresponding JSP view with dropdown lists, data coming from my database. What I need is also a submit button in the same view, and get the parameters from this view (the data selected in the dropdown lists), and then render the resulting list into another view. Is this possible for one controller class to handle?
Thanks in advance!
Regards
Thomas
February 22, 2010 at 11:34 am
Thanks for a good tutorial. This is the best online tutorial for me. I`m new to Spring and was looking for some reliable tutorials. And I found it here. 🙂 Not too difficult to understand and not too easy to pass through. I bookmarked this Blog. Have a nice day~
nope0102
April 26, 2010 at 11:10 pm
it is too good I request you to fill how the flow works
shilpa
May 7, 2010 at 12:28 pm
I am from Peru, and its the best Spring ‘s Tutotal that i had seen!!! Thank you so much, it ‘s so usefull =)
Enrique
June 13, 2010 at 12:51 pm
Your tutorial deserves to be top ranked on google for the terms Spring MVC Tutorial 🙂
Saved my day… 🙂
Thanks
tGilani
August 16, 2010 at 10:45 pm
what, so much work required to process a simple form! Create a controller, validator, model object, configure xml files, learn jstl tags, spring tags, beans everywhere and anywhere. This is separation of concerns taken to such extremes that even a simple form processing requires loads of work from a developer. Really its time to say farewell to such action oriented framework. I don’t mean the entire spring goodies, but just this terrible MVC stuff they have made. Java EE6 had made things so simple, that spring MVC looks almost monstrous. Spring with say JSF would be a better idea than this MVC headache.
nash
September 4, 2010 at 10:54 am
Could you please provide source code project as a zip file? Please………..
Forumans
October 12, 2010 at 8:40 pm
awesome! i wanna share too a link i found in the web. this uses the latest release from spring-framework-3.0.5.. it is a tutorial on creating web apps using spring mvc.
http://www.adobocode.com/spring/a-spring-web-mvc-tutorial
hope you find it okay!
paul
November 19, 2010 at 2:54 pm
Awesome tut! greets from brazil.
Hugo
November 23, 2010 at 12:27 am
Hi, I intend to learn the same things. I’m an italian junior developer, I want to help you and me to learn this arguments.
uzumaki
January 3, 2011 at 12:37 am
Good tips me from Deecoup
Software Development
February 3, 2011 at 12:59 pm
Thanks man.. This helps me to start.
Samrit
February 8, 2011 at 8:59 am
Very Nice Tutorial.
Other websites are not putting every thing at one place.That makes lot of confusion to developers new to Java Technology as this type of frame work is concerned which contains lot of configuration file.Any mistake in configuration file makes problem which is very hard to resolve by beginner.
Thanks
MHIMU waiting for your new post
Niraj
Niraj
February 8, 2011 at 11:24 am
Very nice tutorial! Keep up the good work
lblabla
March 22, 2011 at 7:35 pm
this is really a good tutorial for the begginers
monir
April 1, 2011 at 9:41 pm
I found a very good stuff in your tutorial.
thanks.
shanmuk
April 25, 2011 at 12:46 am
[…] the process described below make sure you configured your spring mvc platform (obviously ). see https://mhimu.wordpress.com/2007/11/2…-mvc-tutorial/ or here http://static.springsource.org/docs/…tep/index.html for details. Then download […]
Spring MVC Integration with Sitemesh and Freemarker - Java Tutorial
June 5, 2011 at 9:52 pm
Salam Alikoum brother,
Mashallah very nice tutorial, can you please put war file or a zip file of these two tutorials, I have Netbeans and Eclipse installed in my machine.
Jazaka Allah khairan.
my email : akramakom@gmail.com
akram
June 10, 2011 at 7:48 am
I’m using Tomcat 7, and when I deploy I’m getting a org.apache.jasper.JasperException error:
“The markup in the document preceding the root element must be well-formed.”
I’m pretty sure it has something to do with the taglib declaration in the jsp file. I’ve been trying to fix this error for over a day now. Any help would be very greatly appreciated.
Michael
June 16, 2011 at 11:20 pm
Simple and complete flow from request to response. This will help me lot to get through my client interview.
Muthukumaran Natarajan
June 28, 2011 at 12:50 pm
Thanks for giving such a nice tutorial. This is very nice one. I got answer from 3.2 section, which i am facing a long time( i.e use of [servlet-name]-servlet.xml).
Gurumurthy
June 29, 2011 at 4:34 pm
8T1uXg http://fnYwlOpd2n9t4Vx6A3lbk.com
geoge
July 28, 2011 at 10:05 pm
Excellent work, Nice Design nude lolitas 12 14 scwzd
Sbbjjjex
August 1, 2011 at 9:07 am
[…] Spring tutorial saved my life. Just sayin’. July 31st, 2011 in […]
bigmarv.net » Blog Archive
August 1, 2011 at 10:59 am
thanks for the tutorial. keep up the good work.
raj
October 31, 2011 at 6:02 am
Spring MVC Tutorial Himu’s Attempt at Blogging I was recommended this web site by my cousin. I am not sure whether this post is written by him as no one else know such detailed about my difficulty. You are wonderful! Thanks! your article about Spring MVC Tutorial Himu’s Attempt at BloggingBest Regards Rolf
cimengse
March 17, 2012 at 10:01 am
Thank you for every other magnificent article. Where else may just anyone get that kind of information in such an ideal means of writing? I’ve a presentation next week, and I am on the search for such info.
bbw
April 11, 2012 at 5:04 pm
hi this is very good site for spring beginers…
Manjunath
December 28, 2012 at 3:36 pm
Right now it seems like BlogEngine is the preferred blogging platform available
right now. (from what I’ve read) Is that what you are using on your blog?
the diet solution
April 10, 2013 at 10:16 am
I do agree with all the ideas you have presented in your post.
They are very convincing and will certainly work.
Still, the posts are too brief for novices.
Could you please lengthen them a bit from next time?
Thank you for the post.
Lionel
April 16, 2013 at 10:31 pm
With a good travel websites provide both domestic and foreign travelers an unmatched online hotel
reservation is ideal for making last minute travel arrangements.
In addition, height limit is strictly set in place to celebrate the honeymoon escapade you
have been traveling.
bar
August 3, 2013 at 12:02 am
Pero además, lo importante es que el Servicio Siemens ofrece al usuario la seguridad de que el técnico que le atiende está perfectamente cualificado, que los repuestos son originales y que tanto éstos como la reparación están garantizados. Hoy en día, en las grandes capitales proliferan las organizaciones piratas”, que buscan captar usuarios a los que, en primer lugar, se les hace un presupuesto que siempre es muy superior al del servicio técnico oficial y, además, se les exige pagar hasta un 50 por adelantado. No olvidemos tampoco que el técnico oficial Siemens es la cara” de la marca en casa del cliente.
Dinah Erxleben
October 16, 2016 at 9:58 pm